Building-A-Simple-Wooden-Gate

Building A Simple Wooden Gate

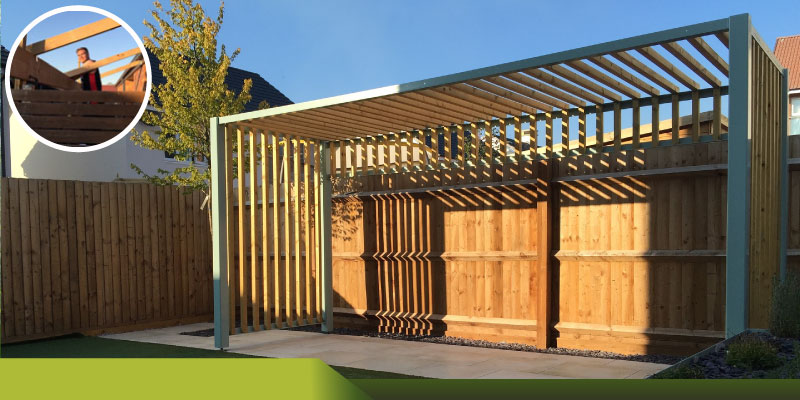
People would probably rather go to the dentist and have a few teeth pulled than build a gate for their fence. In subdivisions you often see fences with the tops of the posts untrimmed or gates unfinished. Why? It’s because they are some of the most difficult jobs to do. When it comes to trimming the tops of posts with a circular saw, the margin for error is quite high and the cut can look very ugly at the end so instead of doing it people just leave it. The same is true with gates. Sometimes people go in the other extreme. They think, I can build a gate no problem but the end result is terrible. What they build is this big bulky monstrosity of a thing that will probably sag in a few days and not latch properly.

There is a way out. When it comes to building a gate, think simple and light. Your fence is going to last a long time, and you want the same to be true of your gate. If you build a heavy gate, the longevity will not be there. After things start to settle and the timber dries out, you’re left with an ugly looking gate.

To build the ultimate wooden gate, you will need the following items:

Wooden Boards

six – 2X4X8 feet (2 inches X 4 inches X 8 feet)
eight – 1X6X8 feet (1 inch X 6 inches x 8 feet)

Other Materials

two – T hinges
one – latch
one – small box of 3 inch screws
one – small box of 2 inch screws

First of all, you need to think of different variables that will affect the way you build your gate. Do you have a small dog? Are you worried that it will get out? Normally people like to build gates that have a 3 to 6-inch gap at the bottom. If you have small dogs, you will want to build it a little bit lower to the ground. Be careful though! Remember that after fences and gates go up there can be a little movement in the gate so don’t go too tight to the ground. Allow for at least 2 inches.

Once you have figured out where the gate will end, you can go ahead and start measuring things. Take a measurement of the width of the opening on the top and bottom. Minus one inch from that measurement to allow room for your latch.

Remember to minus three inches from the total of your height to make up for the allowance of the top and bottom board. If you don’t do this, your gate will be 3 inches taller than you wanted and it might not fit. Screw the gate together like your building a wall. Next, you will need two pieces of wood running horizontally on the top and bottom of the gate. Cut and install them.

Now make a mark on the post where you will mount the gate. Remember that all gates should turn in. When you open it, it should swing into the yard. There isn’t a written rule, but this is normal practice. With two screws, mount the gate on the post to the proper position. Make sure these screws are in a spot that you can unscrew later. These are temporary, but makes things a lot easier. If it’s mounted, it won’t move around when you install the hinges and other hardware.

Once it’s temporarily mounted to the post how does it look? Is it level? Is it sagging? If it needs to be raised, grab a cut of piece of wood and put it under the gate until it is level. To make sure it stays the way you want it, you will need to install a brace. Install a brace on a diagonal from the bottom hinge to the opposite side. This is very import because it will ensure that your gate stays straight. Braces are simple to install. Take a piece of 2 inch by 4 inch wood roughly the same size of the diagonal of the gate. Place it on the back of the gate and with your pencil, trace the inside of the board so it will fit inside the gate. Once it’s traced out, cut it and install it.

Now you can install your two T hinges. Sometimes the screws that they give you with the hinges are not very good. Make sure the screws are at least 3 inches. Once the two hinges are in you can go ahead and take out your two temporary screws. You’re almost there. Open and shut the gate a few times to see how it works.

Next you will install your 1 inch by 6 inch boards vertically. Take a measurement from the top to the bottom. You can minus at least half an inch because you will be installing another board over it horizontally so no one will see the gap. After you have installed your boards vertically, go ahead and measure the width of the top and bottom of the gate in between the 2 inch by 4 inch boards. You will install a horizontal 1 inch by 6 inch board on the top and bottom.

Just one more step. Now you can go ahead and install your latch. Again, there is no set height to install your gate. People normally install it at about 3 inches from the ground. If that doesn’t feel like a comfortable height, then go ahead and switch it.

That’s it. You have conquered the gate world. Now, not only will you have a nice gate, it’s going to stand the test of time and it will probably make your neighbours jealous when you tell them you did it yourself.

Of course, if you don’t have the time to build your own gate, The 2 Men Property Services would be happy to do it for you.

<Back to our The 2 Men Handyman Brisbane page.

Do-IT-Yourself-Deck

Do IT Yourself Deck

With the economy fluctuating like it has in past few years, more and more people are starting to do whatever it takes to become handymen or handywomen. Just paying for the materials alone and not the labour has made it more affordable to do much needed renovations. Fences and decks are two key components to really revamping your back yard. A new fence and deck, especially a deck can make your back yard a hotspot for the summer. Depending on the size or the design, it is something that you can do yourself.

The first thing you need to do is figure out what your local building code is. For example, if you’re building a deck over 6 feet, there are different regulations that you need to follow. Do you need guard rails? Will you be doing this in the front or back yard? All of these factors will affect how you will build it. The nice thing about local building codes is that they usually come in a downloadable PDF file that will nicely explain everything that is required for the job. Most new projects will require permits that can be obtained at the same spot.

Once you have figured out your design, bought your materials, and are sure that you are within building code, it’s time to build! One little useful hint: never do minimum code. In some areas, minimum code for joists on a deck is 2 x 8 inches (38 X 184mm). For a little bit of extra money, why not step it up one size and buy 2 x 10 inch joists (38 X 235mm). This will make it a lot stronger and not hit you too hard in the wallet.

First you will need to install concrete piles or engineered screw piles. Concrete is cheaper but doesn’t have the longevity of a metal screw pile. If using a concrete pile, make sure you have a minimum of 4 feet (1.2m) down to insure no shifting. This will depend on the climate of where you are building.

Next install your ledger board. If you have bought a new house, there should already be one installed for you. Your deck will be depending on this ledger board for a lot of weight so make sure it’s really secured. Use 4 to 5-inch screws (10mm) to fasten it down. Put four screws in the board starting at the top to the bottom roughly every 15 inches (380mm). This will really ensure that the ledger board is on safely.

Next, mount a laser level to the bottom of the ledger board. Make sure that the laser is flush with the bottom of the board. This is going to help you to see how high your 4 X 6 inch posts (89 X 140mm) will be. Once you have got it flush with the bottom of the ledger board, turn it so that it shines the laser over top of your piles. Measure the distance of the top of the pile to where the laser flashes on the tape. Whatever that measurement is will let you know the height of the bottom of the joists. Take that measurement and minus whatever the height of your beam material is. For example, if you measured 15 inches (381 mm) and the size of your beam material was 9.5 inches (241mm) you would cut your post on that pile to 5.5 inches (140mm). Once you have done this for your piles, you are ready to make the beam.
However wide your deck is will tell you how wide your beam is. For example, if you are building a 10-foot (3 meters) wide deck, you will have a 10-foot wide beam. To ensure your deck will support a lot of weight, use a 3 ply 2 X 10-inch beam (38 X 235mm). The 3 ply means that you will be screwing three 2 X 10’s together like a sandwich. Once you’re done, set your beam on the three post that you cut.

Next, install your two outside joists. Don’t worry about cutting any of your joists, you will do this once you are done. Once the outside joists are squared, cut off any of the beam that will stick out on either side of the deck. Next, mark out the joists starting from the left to right side at 16 inches on center. Do this on the ledger board and the beam.

Once this is done, start installing the joists. Attach it with two screws to the ledger board and two screws to the beam. The screws on the ledger board are temporary. After the joists are installed, you will go back and install the joist hangers. Once you have installed the joist hangers and all the joists are secured, you’re ready to cut them. Measure from the ledger board to the beam on the outside joists to the desired length of your deck. For example, if it’s 8 feet (2.4 meters), mark it on the two outside joists. Once marked, snap a chalk line on those two marks. Next, on the chalk line of every joist, square off the line and cut it with a skill saw. This will ensure a nice flush line with your end board. Once this is done, pick a nice straight 2 X 10-inch board and screw it to the end of the joists. Make sure the joists are flush with this board.

Next, start installing the decking boards. Make it easier on yourself by letting the boards hang over. You can cut the excess off once you’re done installing them all. This will make the line nice and straight with all the boards being flush. Make sure when your screwing the boards down that there are two screws for every joist. This will prevent squeaky boards.

Building a deck can be done. It just takes some time and a lot of planning. There are a lot of videos available as well. If building a deck seems too daunting, then you can always hire a contractor like the professionals at The 2 Men Property Services.

<Back to our Handyman Services page

Perfect-Pergola

The Perfect Pergola

Pergolas are great outdoors as they can give shade and add uniqueness and luxury to an outdoor setting. Pergolas have wooden posts and overhead rafters that can be decorated by cloth or gorgeous vines. Underneath the pergolas can be a setting for a comfy outdoor couch, patio chairs, table, bed, or swing set.

How do you go about making a pergola?

First of all, you’ll need to make a plan of what you want your pergola to look like. There are many ideas you can find online, so do your research to see what will suit you and your family’s needs. Figure out where you’ll be putting your pergola and prepare the area. You can either put it as part of your deck or patio or you can put it by itself on the ground in your yard. You’ll need to anchor the pergola in the ground so it doesn’t move. Make sure the area you’ll be anchoring it doesn’t have tree roots. Have city or local municipal services check for and identify water and gas lines so you won’t hit them when digging into the ground. Check to see if you’ll also need a permit for the type of pergola you build.

If it’s a free-standing pergola, you’ll need to have it at least three feet into the ground but four feet is better. Check with the local building code to see what the minimum and maximum requirements are for building pergolas. If it’s attached to a deck, you’ll have to mount it and anchor it to the frame of the deck to secure it.

Once you’ve got the plans ready, gather the materials and tools you’ll need to have on hand to build your pergola. Cedar is one of the best types of wood for building pergolas because of it will last a long time and is naturally resistant to rot, but it will cost you. The next best thing would be to use pressure-treated wood.

After you’ve decided on what type of wood you’ll be using, measure where you’ll be putting in the holes for your posts. Next, dig the holes for your posts. Digging is hard work by hand and can be really frustrating so use a hand auger for this or hire a skid steer with an auger attachment for even an easier way to dig holes for your posts.
Put in your posts and level them. Use a cement mixer (also can be rented) or mix one or two bags of cement with water with a shovel before putting the cement in the holes with the leveled posts in them. One or two cement bags are good enough for these holes depending on how big your posts are. Do this for all the posts. Make sure they are level and straight and make adjustments before the cement sets. It helps to have a temporary plank attached to the posts connecting them at horizontal level lines to keep them straight until they set.

When the cement has set, fill in the leftover space with soil. Install the measured and cut rafters and cross beams according to the plans you’ve made for your pergola. The rafters should sit on the crossbeams which are attached to the posts. The crossbeams should also be secured to the posts.

For the easy part, choose plants that you’ll want to climb on your pergola or just plant bushes to make a living wall for your pergola. Plant those where you want them to cover your pergola and set up your chairs or other outdoor furniture inside the pergola once the area has been cleaned of all building material.

If you are unable to do it yourself, hire professionals like The 2 Men Property Services to build you a beautiful one.

<Back to our Professional Handyman page

Deck Recovery

Deck Recovery

If you already have a deck and was wondering whether or not to replace it, have a proper and close look at your deck. Inspect closely where deck wood boards and planks are butting each other. This is likely where you’ll find rotted wood. Where the deck boards are touching cement is also a good place to check for rotted boards.

If you can get under your deck, check to see if there any cracked posts or posts that are out of alignment. If you have concrete piles, make sure they are still deep enough that the pile is sitting on firm soil and that it hasn’t moved. For metal piles that have been there for 50 years or more, have a look at them to make sure they’re not rusted out. If you have a railing, does it move and is it rotted in some places? If it moves, it will need to be secured and rotten areas replaced. Make sure your deck meets all the rules and regulations required by law, so check your local building code to make sure everything has been done properly or if you need to redo your deck up to code. Call The 2 Men Property Services to help you get your deck up to standards if you are unable to do it yourself.

If you decide that your deck is salvageable and you want to refinish it, here are some tips on how you can make it look brand new again.

1. Take off the previous stain or deck paint. If you need to use chemical removers, read the manual for proper use and wear the correct personal protective equipment to prevent chemical damage to yourself by exposure to paint or stain remover chemicals. Cover the area around your deck with tarp to prevent these chemicals from getting on the ground and on your grass or plants.

2. Replace rotted boards or planks. Reinforce loose planks or railing.

3. Pressure wash the deck so it’s free of dirt and peeling paint. Be careful that the pressure washer is not too powerful as it will damage or burr the wood. A 2500 PSI washer is good enough to use in cleaning your deck. If you want to treat your deck for mildew resistance if your wood hasn’t already been pressure treated, treat your deck at this time before staining or painting it. Read the manual on the product container for the proper concentration and proper application. It’s best to use a treatment that’s biodegradable as it’s more friendly for the environment.

4. Once dry completely, it’s time to sand your deck. You can rent a sander from your local hardware store. The sanders that are best to rent or buy are 10 cm belt sanders, palm sanders, and sponge sanders. They are perfect for deck boards. Always wear the proper breathing mask to prevent wood dust inhalation that can damage your lungs. Wear proper eye protection and work gloves before sanding as well. Start with using the coarse grit first and go back and forth with the grain until old paint and mildew is gone. Use the palm sander on ends and hard to reach places. For even harder to get to areas, use a small square or rectangular sponge sanders. Move on to fine grit sanding that will prepare the wood to absorb the paint and stain better and get better coverage. After sanding you can sweep, vacuum, or use a leaf blower to get rid of the fine wood dust left over by sanding.

5. Before staining, it’s good think about the weather. If you are cramped for time and need to get the deck done rain or shine, make sure your project is well protected by tarps so absolutely no water can get on the deck. The deck needs to be completely dry before staining. It’s not recommended to do your staining in rainy weather. If you can, stain your deck when the weather is dry

< Back to our Homepage

Painting-The-Outside-Of-Your-House-

Painting The Outside Of Your House 

Your outside house walls looking a little tired and your paint is peeling? It’s time for a new paint job. You don’t want the peeling to continue and bring damage to your walls due to exposure to the elements. If you already have wall damage, call The 2 Men Property Services. Repainting the outside of your house before serious damage happens is vital.

What type of paint should you use?
There are two types of paints generally used outside. One is water-based and the other is oil-based. The pros of water based exterior paints is that it responds well to temperature changes outside. It dries fast, and is resistant to moisture. The pros of using oil-based paints is that if you have metal or wood that tends to bleed, it will stop the bleeding and holds on to metal better than water-based paints. It will stay on your walls longer and goes deeper into your walls than water-based paint. If you’re repainting a wall and if the wall already has been painted with water based paint a long time ago, it is best to use water-based paint again on the wall instead of oil-based for the new paint job. The same rule applies if the outside walls have already been painted with multiple layers of oil-based paints before. It’s best not to paint over it with water-based paint. Like regular oil and water don’t mix, oil-based and water-based paints don’t go well layered together.

If you’re working with raw outside wall materials that haven’t been painted before, you have to put a primer on it. Again, use primers according to the paint finish you will use. Water-based primers go with water-based finish paint and oil-based primers go with oil-based finish paint. If there are exposed metals, wood, or cement use primers that are for each specific material.

There are three types of finishes you can choose from. You can get a matte look which is great for hiding ugly spots and great for siding. The gloss look is very shiny and is the easiest to get dirt and dust off. It’s great to use for fine details on the outside of your house like doors and outside trim. It’s not the best for siding or regular walls outside. Satin is a mix of both worlds. It’s not so shiny and not so matte. If you’re looking for very specific paint and color for your house, you can get your local paint store to mix you your own special batch of paint specifically designed to suit your outdoor painting needs. Just make sure you have enough to finish with and enough left over for minor repairs later. Make sure you read the directions for use before applying the paint.

If the paint has been sitting a while at the hardware store, mix the paint well or ask your local paint store to mix it for you with their mixing or shaking machines.

How can you prepare the outside of your house for painting?
Scrape, brush, and sand off peeling paint. If any repairs must be made, fix them before painting as leaving it will take more work later. You can use a pressure spray days before painting to get dirt and dust off completely. Make sure your wall is completely dry before painting and the weather will be good on the days you paint. Make sure all nails or screws are completely below the wall surface and if there are holes, fill them up with exterior putty so the heads of nails, screws, and construction staples won’t show. For smaller surface areas, trims, or edges, use brushes of different lengths according to the size of the area. For larger surface areas, use a roller. It’s best to paint on the shaded part of the house first and move as the sun moves. Start from top to bottom. Move your ladder as you go. Don’t overextend yourself as you can fall and injure yourself seriously. Make sure your hips are square with the ladder and facing the ladder at all times.

< Back to our Brisbane Handyman page

Ten Unique Kitchen Ideas That Make Life Easier

Ten Unique Kitchen Ideas That Make Life Easier

1. For kitchen drawers, there never seems to be enough room for all your utensils, especially long ones like your rolling pin. Why not organize them diagonally by putting in diagonal dividers for your different utensils? That will keep them organized and you’ll have enough space for all of them.

2. Dollar store cupboard mats. Forget buying expensive mats to line your cupboards and kitchen drawers. Buy them in rolls cheaper from the dollar store. Cut them to size as needed.

3. Don’t have enough cupboard space? Hang coffee mugs on your walls. Get yourself a wooden pallet. Attach several hooks to it. Make sure that the handles of your mugs will fit on the hooks and there is enough space for the mugs to hang freely. Hang the pallet on your kitchen wall readily accessible whenever you need a drink!

4. We all have a problem with finding lids for Tupperware containers. Somehow they get lost somewhere never to be found again. It is frustrating when trying to store food away when you can’t find the proper lid for it. Never have this problem again. Hook up a metal or plastic file organizer on the back of a cupboard door. Whenever you’ve finished washing and drying the containers and their lids, store the lids in the folder organizer and the containers on the shelf opposite in the cupboard. This will make it easier to find the containers and lids for later use.

5. When you accumulate plastic grocery bags, how can you organize them? Save Lysol wipes containers and put the plastic bags in there so that they’re not all over the place in your kitchen cupboards or pantry. Just pop the container open and pull out a bag when you need one.

6. There is usually a false door under your sink because there isn’t a lot of room for a real drawer space. Use that little space to install a paper towel holder. It’s very convenient for food preparation and for not dripping water everywhere looking for the paper towels. You can also install a kitchen towel holder on there instead.

7. On the back of your pantry door, hang a mesh or plastic shoe organizer but instead of shoes in the organizers, you can hang your spices in there. It will be easy to find all your spices when you’re cooking.

8. Have you seen those tiered metal planter skeletons that hold up planters for flowers? You can also use those for holding fruits and vegetables that don’t need to be refrigerated. Bring those planters inside and hang them against the kitchen wall or if it’s a stand, just move it to a free corner in your kitchen. Put fruits like bananas and apples in there.

9. If you don’t have a lot of bench space and need some more space to dry your dishes, you can put in sink baskets in both sides of your kitchen sink if it is a double sink or just one if a single sink to let your dishes air dry.

10. Install a hanging island from your ceiling. This is especially useful if you don’t have a lot of space. If you need help with installing it, call The 2 Men Handyman Brisbane and let them do the backbreaking labour for you. Hang your pots and pans and other kitchen utensils from it. You can also hang your indoor plants on it to give your kitchen a chic look. If you can’t hang an island on your ceiling, make yourself a moveable one with shelving units on it. It should have wheels at the front of it with legs in the back and a long handle/paper towel holder on the side that you will push with.

This is great for entertaining as you can move it to the living room or outdoors on your patio.

Change Things Up To Increase Home Appeal

Change Things Up To Increase Home Appeal

When you sell or your home or just want your home to be in tip top shape, it’s best to do some renovations or changes to your home.

One renovation that is simpler to do than many other home projects is painting. It’s amazing how just changing the color of a room can completely give that same space revitalization. When selling, it’s best to go with neutral colours but add some pizazz. Add a splash of color by choosing a deep candy-apple red or navy-blue for a feature wall that will draw the eye of potential buyers or a colour that you will be satisfied living in.

Kitchen renovations are more challenging. You will have to deal with plumbing, cupboards, and a lot of finicky things that take more time to renovate. Most women love to have a lot of bench space for preparation and cooking. Replace old benches with granite if you can. It looks good and is durable. If you want extra bench space, install an island in your kitchen with matching bench-top material. Replace old taps with modern ones. Sand and repaint or restain old cupboards to give them new life.
For bathroom renovations, get rid of old linoleum or vinyl and upgrade it to water resistant tile. Tile makes it so much easier to wipe up water spilled from the sink, shower, or bathtub. To save on water, get low-flush toilets that you can flush either for liquid or solid waste. If you can’t afford to do major renovations, simply repaint the bathroom with moisture-resistant paint and change the shower curtains and bathroom mat. Want more space? Replace your old sink with a pedestal sink that leaves a lot of leg room and makes a small bathroom look bigger.

To really completely change the inside of your house, focus on the floor. Upgrade your floors and install modern-looking flooring. If you have hardwood, make it brand new again by resanding and refinishing it. For more durable but beautiful flooring, your options could be to install stone, tile, engineered, or vinyl flooring.

Revamp your yard by putting in a patio or deck. Properly installed pressure treated wood or cedar adds natural beauty and enhances the look of any yard. If you don’t have the ability to build these yourself, have The 2 Men Handyman Brisbane build you a beautiful deck, patio, or privacy screen.

One renovation project that can be easily overlooked is roof renovation. Replace your old ashphalt shingles for better roofing material like tin. Doing this will add a lot of value to your home.

Tired of looking at the same windows and doors? Install more efficent double-paned windows and more secure doors. If you don’t want to replace your door, one way to make it look new again is to resand and repaint or refinish it if it is wood.

For better first impressions when people come to your home, revitalize the landscaping in your yard. Plant some colorful and different-sized perennials that grow back every year so you won’t have to keep planting flowers. Hedges or flowering bushes surrounding the drive is another good idea. If you have flowering plants, keep the plants continually blooming by using plant fertilizer or rain water to nourish your plants.

Changing your house and yard a little bit by applying the advice given above will make you the envy of the whole neighbourhood.